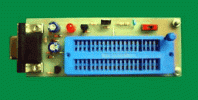
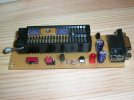
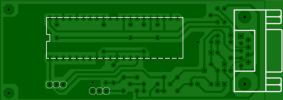
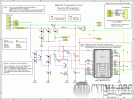
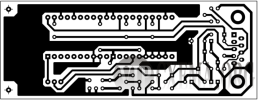
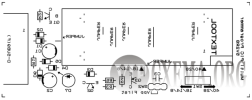
Multi PIC Programmer 5 Ver.2 is a PIC programmer, which can program to 8-pin to 40-pin devices using single ZIF socket. It is the first PIC programmer, which was built by me when I began electronics hobby one year ago. There are many kinds of PIC programmers. The programmer, which I built, does not need an external power supply, and since there are only few parts, it is very cheap and can be built easily. This PIC programmer is called "JDM programmer". This name comes from the name of Jens Dyekjar Madsen who devised this first. His homepage is here.
I built "Multi PIC programmer 5 Ver.1", in order to enable it to program 40-pin devices like PIC16F877 with a ZIF socket. The number ‘5’ is because it is the 5th set of the programmers which I built based on the JDM programmer. This PIC programmer's circuit diagram can be downloaded from my homepage.
Lately I improved this PIC programmer. The main improvements are having made it suit "VPP before VDD" and changed wiring of a ZIF socket for accepting devices with LVP (Low Voltage Programming) mode. Information about "VPP before VDD" is available in my homepage.
Before you build this "PIC programmer", I recommend checking to see if there is enough output voltage at the serial port your personal computer. If TxD, DTR, and RTS do not have more than +7.5V (or -7.5V), this programmer will not work well, especially, with the latest laptop computers that using low power RS232 interface ICs.
Other important matters are:
Print using different paper source options. Choose File > Print, and then do one of the following:
I built "Multi PIC programmer 5 Ver.1", in order to enable it to program 40-pin devices like PIC16F877 with a ZIF socket. The number ‘5’ is because it is the 5th set of the programmers which I built based on the JDM programmer. This PIC programmer's circuit diagram can be downloaded from my homepage.
Lately I improved this PIC programmer. The main improvements are having made it suit "VPP before VDD" and changed wiring of a ZIF socket for accepting devices with LVP (Low Voltage Programming) mode. Information about "VPP before VDD" is available in my homepage.
Before you build this "PIC programmer", I recommend checking to see if there is enough output voltage at the serial port your personal computer. If TxD, DTR, and RTS do not have more than +7.5V (or -7.5V), this programmer will not work well, especially, with the latest laptop computers that using low power RS232 interface ICs.
Other important matters are:
- The GND line of a serial port forms relative VDD on a PIC programmer. All the GND symbols in a circuit diagram are a PIC programmer's GND. Never connect them with GND line of a serial port.
- This PIC programmer changes VPP in accordance with the device selected (8-18pin) or (28-40pin) with one sliding switch. So, if the insertion position of a device and slide switch is not set correctly, your PIC may be damaged by over voltage.
- This PIC programmer does not support all PIC MCUs. (PIC16C5x is not programmable with this programmer, but using an adapter, the 20 pin PIC 16C770/771 can be programmed.
- I did not try all PICs since and I do not have all them. The PICs, which I successfully programmed and verified, are PIC12F629, PIC12F675, PIC16F627, PIC16F628, PIC16F630, PIC16F676, PIC16F818, PIC16F819, PIC16F84A, PIC16F873, PIC16F877A, PIC18F2320, PIC18F452.
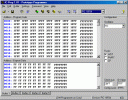
- The programming software used is IC-Prog of Bonny Gijzen. Click here to downlaod the software.
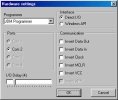
- "Hardware settings" of IC-Prog are the same as the JDM programmer.
Print using different paper source options. Choose File > Print, and then do one of the following:
- In an Acrobat 6.x product , select Choose Paper Source by PDF Page Size, and then click OK.
- In an Acrobat 5.x product:
- Click Advanced.
- Select Choose Output Tray by PDF Page Size.
- Click OK to close the Print Settings dialog box, and then click OK to print.
Eklentiler
Son düzenleme:

