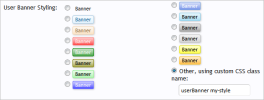
These instructions will explain how to create your own custom CSS for user banners.
Give the banner a title:

Choose a class name for your custom class, in this example we are using my-style.
Add it to the custom CSS field for the user group, like so:

If you want the banners to wrap around the message user info block then you must also use the userBanner class, as shown above.
Note that there are no . before the class names and they are separated by a space.
Then add the class and your code to EXTRA.css.
You can style it how you want, for example, this code:

Whereas this:

If you don't want the wrapping effect, simply don't include the userBanner class in the custom CSS field and EXTRA.css.
Give the banner a title:

Choose a class name for your custom class, in this example we are using my-style.
Add it to the custom CSS field for the user group, like so:

If you want the banners to wrap around the message user info block then you must also use the userBanner class, as shown above.
Note that there are no . before the class names and they are separated by a space.
Then add the class and your code to EXTRA.css.
You can style it how you want, for example, this code:
Kod:
.userBanner.my-style
{
color: white;
background-color: green;
}
Whereas this:
Kod:
.userBanner.my-style
{
color: white;
background-color: green;
border-color: green;
}
If you don't want the wrapping effect, simply don't include the userBanner class in the custom CSS field and EXTRA.css.
